The 10 Most Scariest Things About Door Handle Repair And Installation

본문
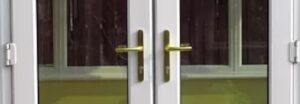
Door Handle Repair and Installation: A Comprehensive Guide
door handle fixer handles are one of the most overlooked yet necessary parts of any home or workplace. They function as the primary means of accessing and securing a space, yet they often break or become harmed over time. This blog site post will offer an in-depth summary of door handle repair and installation, lowest price,, highlighting the necessary tools, the detailed procedure for both repair and installation, the kinds of door handles offered, and some regularly asked questions to help readers make informed choices.
Why Door Handle Repair and Installation Matter
Door handles can break, become loose, or fail to operate properly due to comprehensive usage, exposure to the components, or basic wear and tear. Correct best door handle repair handle functionality plays a significant function in both security and benefit in life. Whether it's a residential door or a workplace entryway, a working door handle is crucial.
Typical Issues with Door Handles
Before diving into repair and installation, it's necessary to understand the typical issues that can occur with door handles:
| Problem | Description |
|---|---|
| Loose Handle | The handle might wobble and not run smoothly. |
| Sticking Mechanism | The handle may stick or be tough to turn. |
| Broken Handle | The handle might snap or break under pressure. |
| Misaligned Hardware | The whole mechanism might be off-center or misaligned. |
| Rust and Corrosion | Metal handles can rust, impacting their function. |
Comprehending these issues can help homeowners take suitable action, whether it's a simple repair or a complete replacement.
Tools and Materials Needed
Before trying any repair or installation, guarantee you have the following tools on hand:
Tools
- Screwdriver: Typically, a Phillips head or flathead screwdriver will be sufficient.
- Drill: Necessary for setting up new handles if drilling is needed.
- Pliers: Useful for eliminating stubborn screws or clips.
- Measuring Tape: For exact measurements, especially if installing a new handle.
- Level: To make sure the handle is set up properly.
Materials
- Replacement Handle: Choose a handle that matches your requirements and design.
- Screws: If not included with the new handle.
- Lubricant: For sticky systems to improve performance.
- Wood Filler or Touch-up Paint: If you're fixing the door handle repair company frame or handle area.
Step-by-Step Guide to Door Handle Repair
Fixing a Loose Handle
Recognize the Problem: Determine if it's a loose screw or a more substantial problem.
Tighten up the Screws: Using a screwdriver, tighten up the screws on the handle's base.
Inspect the Mechanism: If the handle is still loose, you might have to take apart the handle to inspect the internal mechanism.
Reassemble the Handle: Ensure all parts are fitted tightly before reassembling.
Fixing a Sticking Mechanism
Eliminate the Handle: Unscrew the handle from the door handle restoration service and separate it from the latch.
Tidy the Mechanism: Use a cloth to clean up any dirt or particles.
Apply Lubricant: Apply a silicone-based lube to the latch and system.
Reassemble and Test: Put whatever back together and test the functionality.
Changing a Broken Handle
Remove the Old Handle: Unscrew the broken handle and remove it from the door.
Measure the Space: Measure the existing hardware to make sure the brand-new handle fits.
Connect the New Handle: Follow the producer's guidelines for securing the new handle in location.
Test the New Handle: Ensure that it runs smoothly and functions correctly.
Step-by-Step Guide to Door Handle Installation
Installing a New Door Handle
Select the Right Handle: Select a handle that matches the door design and satisfies functional requirements.
Mark the Placement: Use a determining tape to mark where the handle will be set up, guaranteeing it aligns with any existing holes.
Drill Holes: If necessary, drill brand-new holes for the handle and lock system.
Install the Latch: Insert the lock system into the door edge and protect it with screws.
Connect the Handle: Place the handle on either side of the door, aligning it with the lock mechanism.
Secure the Handle: Tighten all screws and guarantee whatever is protected securely.
Final Check: Test the handle to guarantee it operates efficiently.
Types of Door Handles
When choosing a door handle, consider the following choices:
| Type | Description |
|---|---|
| Lever Handles | Easy to use and typically designed for accessibility. |
| Knob Handles | Standard style, may require more grip strength to utilize. |
| Euro Profile Cylinders | Typical in Europe, supplies both locking and opening function. |
| Deadbolts | Includes additional security, typically utilized in conjunction with handles. |
| Smart Handles | Digital or electronic handles that offer keyless entry. |
Tips for Choosing the Right Door Handle
Consider Use: Choose a design that satisfies the needs of its users. For example, lever handles are often more easy to use for kids and the elderly.
Match Decor: Select a handle that matches existing office or home decor.
Check Durability: Invest in handles that are made of top quality materials to stand up to wear and tear.
Often Asked Questions (FAQs)
1. How do I know if my door handle needs to be replaced?
Signs include extreme wobbling, sticking systems, or if the handle is physically damaged or broken.
2. Can I set up a door handle myself, or should I hire a professional?
Many individuals can effectively install a door handle with basic tools and instructions. However, if you're unpleasant with DIY tasks or your door requires special installation, hiring a professional is suggested.
3. What kinds of door handles are best for security?
Deadbolts integrated with lever or knob handles offer improved security, while clever handles with electronic locking systems include convenience and security.
4. How can I preserve my door handle to lengthen its life-span?
Frequently clean the handle, tighten screws, and use lubricant to the mechanism as needed. Look for rust and use protective coverings if required.
Repairing or installing a door handle may appear daunting, but with the right tools and knowledge, it can be a straightforward DIY task. Comprehending the common issues, choosing the appropriate handle, and following the outlined steps will ensure that your door handles function successfully for many years to come. Whether going with a repair or a full installation, guaranteeing the security and convenience of your doors is constantly worth the effort.
댓글목록0
댓글 포인트 안내